DIY Tiling Tools: Everything You Need to Make Your Next Tiling Project a Success
Having the right tiling tools and accessories is essential in any commercial or DIY home improvement project as tiling is a key element of any interior design. It makes an interior aesthetically appealing and ensures its longevity as well. In addition, tiling increases the ease of maintenance of a bathroom and kitchen, or, in fact, any other space they are laid.
DIY is exciting because you get to create what you’ve imagined and save a lot of money on labour costs. Additionally, laying tiles is oddly satisfying. However, no matter how exciting or satisfying tiling may seem, it is certainly a challenging task. That’s why before you try and attempt any DIY tiling, you should do some thorough research. First things first, you need to know what tools you need for your DIY tiling work. Then you can look at whether it is a clever idea to buy or rent your tile tools.
So, What Tools Do I Need for DIY Tiling?
For starters, you will need a tile cutter. This is essential as there will come a point when you must cut a tile to size to ensure a neat and snug fit. There are two types of cutters available, a wet cutter and a snap cutter. The wet cutter has a diamond or carbide grit that allows you to cut glass, stone, porcelain, or ceramic tiles. The grit gets flooded with water to prevent the blade and tile from heating up. Another type of cutter is the snap cutter, which you used to score the tile and snap it. This tile cutter cannot be used for large tiles if you want a clean edge. However, it is suitable for ceramic, glass, and porcelain tiles.
Once you’ve got your tile cutting tools sorted, you will need to think about how you will be mixing the tile adhesive. There are two essentials for this stage: a bucket and mixing paddle. The buckets are usually a thick plastic, and you can mix the adhesive in it with a mixing paddle. The paddle is essential because tiling mixtures are thick and cannot be mixed by hand as by the time you’re done, it will have solidified, or you are likely to be left with a lumpy mixture that is completely useless. A mixing paddle, on the other hand, is fast and produces a homogeneous mixture.
Once you have your adhesive mixed you will need to start applying it to the prepared surface. The best tool for application is the notched trowel, this is an essential tool for spreading the adhesive on a wall or floor. It creates a ridged layer of adhesive which makes sticking the tile a lot easier.
Another important DIY tiling tool is the tile nipper. This is essential for cutting small pieces of tile into irregular shapes such as semi-circles or circles. Tile nippers or nibblers have jaws and plier-like handles that you press to make the cut with the help of the jaws.
Once a tile is placed you will need to make sure it adheres to the layer of adhesive. To enhance the adhesion process, you need to buy the cheapest of tiling tools: a rubber mallet. This tool resembles a hammer, but it is much lighter and broader. Sometimes DIY-ers may get lazy and avoid buying a rubber mallet and try to replace it with DIY alternatives such as a hammer. But this is one tile tool you don’t want to cut corners on. One reason being that it is an inexpensive item and secondly, it’s designed for its purpose as rubber mallets are much lighter and broader than hammers. They exert the right amount of force to facilitate adhesion without breaking or displacing the tile. This is the best tool to use to lay tiles.
Once installed, the space between the tiles needs to be filled or grouted. The best tool for this is a grout float. It resembles a concrete trowel, but it has a rubber base that helps pack the grout in the gaps or joints between the tiles and removes the excess.
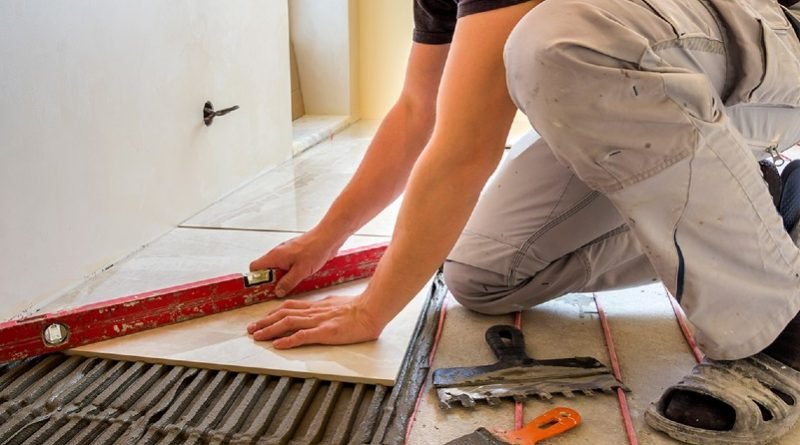
There are two DIY tiling tools that deserve a mention, though a bit old school they’re still useful: a chalk line and bubble level. Both help with straight lines at some point of the tiling process. A bubble level helps ensure that the tiles are placed level, while a chalk line helps ensure they are placed in a straight line. The chalk line is particularly helpful if you are creating a pattern because then, as the name suggests, you can chalk out the lines before you start laying the tiles. If the pattern involves straight lines, then you will have a good guide.
When laying tiles, it is important to ensure that the tiles are evenly placed. In the past, tilers would use rope or screws. This technique worked to an extent but wasn’t as accurate as the currently used tile spacers. These offer another advantage though: they prevent air from getting in between the floor and tile which can cause air bubbles to enter the space and exert pressure on the tile, causing it to become detached from the floor.
Once laid and grouted you will need to remove the excess grout and clean up the tiles. The best tiling tool for grout cleaning is a grout sponge. It is much denser than a regular sponge and it manages to tidy up well.
If your tiling area consists of multiple types of materials, such as wood and porcelain tiles, then you will also need to invest in angles and trims. The reason for this is tiling made from different materials has varying thickness and when placed together the surface will have varying levels. The angles and trims eliminate these differences in levels and ensure a seamless transition between different surfaces of varying tiling material.
What Is the Best Tool for Grout Removal?
Whether you are laying or removing tiles, you may need to remove grout. People may opt for removal in one of two cases; either the grout has become filthy, and you want to re-grout your tiles, or you could simply be grouting a newly tiled surface. If you are looking for a grout removal tool, then you may need to get a reciprocating saw or oscillating tool. It can easily get into the tile joints and remove the unwanted grout.
However, if you are a first time DIYer, then you should try to avoid power tools, such as a reciprocating saw or oscillating tool. This is because without the right expertise you may end up doing more damage than good by hurting yourself. Instead, you can use a chisel and hammer to carefully chip away at the grout.
Setting Yourself Up for Success: Where to Find Your Tiling Tools, Equipment & Accessories
If it’s your first-time tiling, then it is important that you are aware of the right tiling tools and accessories to ensure you create a long lasting and aesthetically appealing interior design masterpiece. The first step would be to find what you need and how to use it. The best place to get this information in this day and age is the internet. You can go and read blogs — like this one! — and watch YouTube tutorials.
Once you are equipped with this information, then the next step is finding a dependable supplier of tiling tools and accessories. If you are on the lookout for a suitable place for tiling tools and equipment, then you should check out online shops. Some of these shops are family-owned, Australian businesses with a vast range of tile tools and accessories to choose from.