How To Hang Plasterboard In Your Home DIY Project As A Complete Novice
Embarking on a home improvement project can be daunting, especially for those new to the DIY world. You might be considering hiring a professional to plasterboard your home, but with some careful planning and preparation, it is a task you can do and save money. A novice can tackle seemingly complex tasks with the right guidance and tools. This comprehensive guide will walk you through the step-by-step process of hanging plasterboard to transform your living space and unleash your inner DIY enthusiast.
Understanding Plasterboard:
Before diving into the hands-on work, it is essential to understand what plasterboard, also called drylining, is and why it’s a popular choice for interior walls and ceilings. Plasterboard is a versatile building material composed of a gypsum core sandwiched between two layers of paper. It provides a smooth and durable surface, making it an ideal choice for finishing walls and ceilings. It is also cheaper and less time-consuming than traditional wet plaster, which requires a lot of skill to apply to walls and make them look fantastic.
Getting Some Tips Online
Before starting to try to hang the plasterboard for your DIY project, it is worth exploring the many videos available online to get some tips and advice to make the job easier. There are many online platforms available that have detailed instructional videos that you can use to help you when hanging plasterboard and can make the task much easier for you. Take the time to watch a few videos to understand better the work you will be doing. It can help ensure you do the task to a higher standard and do not waste as much time or materials.
Materials and Tools:
To get started, gather the necessary materials and tools for the project. You will need the following:
- Plasterboard sheets
- Drywall screws
- Screw gun or power drill
- Utility knife
- T-square or straight-edge
- Measuring tape
- Pencil
- Joint tape
- Jointing compound
- Jointing knife
- Sandpaper
- Dust mask
- Safety glasses
Measuring and Marking
Begin by carefully measuring the walls or ceiling where you plan to hang the plasterboard. Use a measuring tape, pencil, and T-square to mark the dimensions accurately. It’s crucial to measure twice to ensure precision and avoid wastage.
Cutting The Plasterboard
Once you have your measurements, transfer them onto the plasterboard sheets using a pencil and T-square. Using a utility knife, score along the marked lines, then snap the board along the score line. Trim any rough edges with the utility knife for a clean finish. Remember to wear safety glasses and a dust mask to protect yourself from dust and debris during this process.
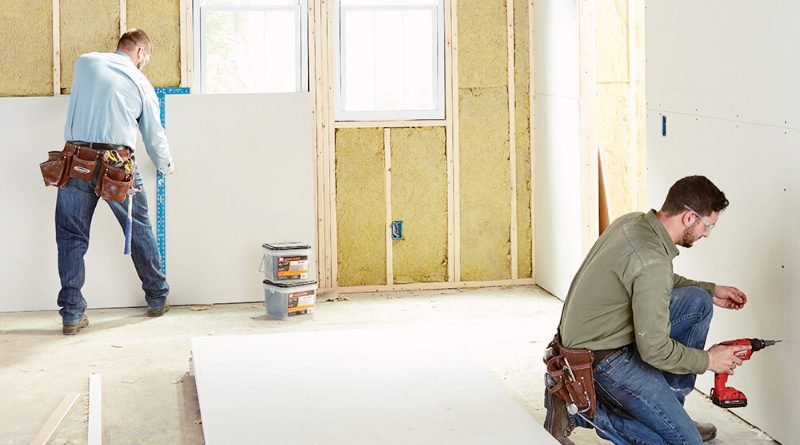
Hanging The Plasterboard
With your plasterboard sheets cut to size, it’s time to start hanging them. Begin in one corner and work your way across the wall or ceiling. Use drywall screws to attach the plasterboard to the studs, making sure to space the screws at regular intervals, typically every 6 to 8 inches along the edges and every 12 inches in the field.
Pro Tip: Be mindful of electrical outlets and switches and use a utility knife to cut openings in the plasterboard to accommodate them.
Dealing With Corners & Edges
When you encounter corners, you’ll need to create a neat finish. Measure and cut the plasterboard to fit snugly against the adjoining wall. Use tape and jointing compound to cover the seams between the sheets, ensuring a smooth transition.
Use a straight edge to guide your utility knife and create clean, straight cuts for ceiling edges. Again, apply joint tape and jointing compound to achieve a seamless look.
Finishing Touches
After the plasterboard is securely in place, it is time to focus on the finishing touches. Apply jointing compound over the screws and joints, smoothing it with a jointing knife. Once dry, sand the surface to achieve a uniform and smooth finish. This step may require multiple coats, so be patient and allow sufficient drying time between applications. Safety Reminder: Always wear a dust mask and safety glasses when sanding to protect yourself from airborne particles.
Painting & Decorating
With the plasterboard in place and the joints seamlessly finished, your walls and ceilings are ready for the final step – painting and decorating. Choose a high-quality primer and paint to ensure a durable and aesthetically pleasing result. Allow the paint to dry completely before moving furniture back into the room or resuming regular activities.
Hanging plasterboard may seem challenging for a DIY novice, but with the right materials, tools, and a systematic approach, it is a manageable project that can transform your living space. By following this step-by-step guide, you will gain the confidence and skills needed to tackle more complex DIY projects in the future and expand your DIY skills. Ensure you are sufficiently prepared and have the correct tools and materials, and you will find hanging plasterboard is much easier than you thought.
Also visit Digital Global Times for more quality informative content.